The students were able to describe the contributions they made to the project.

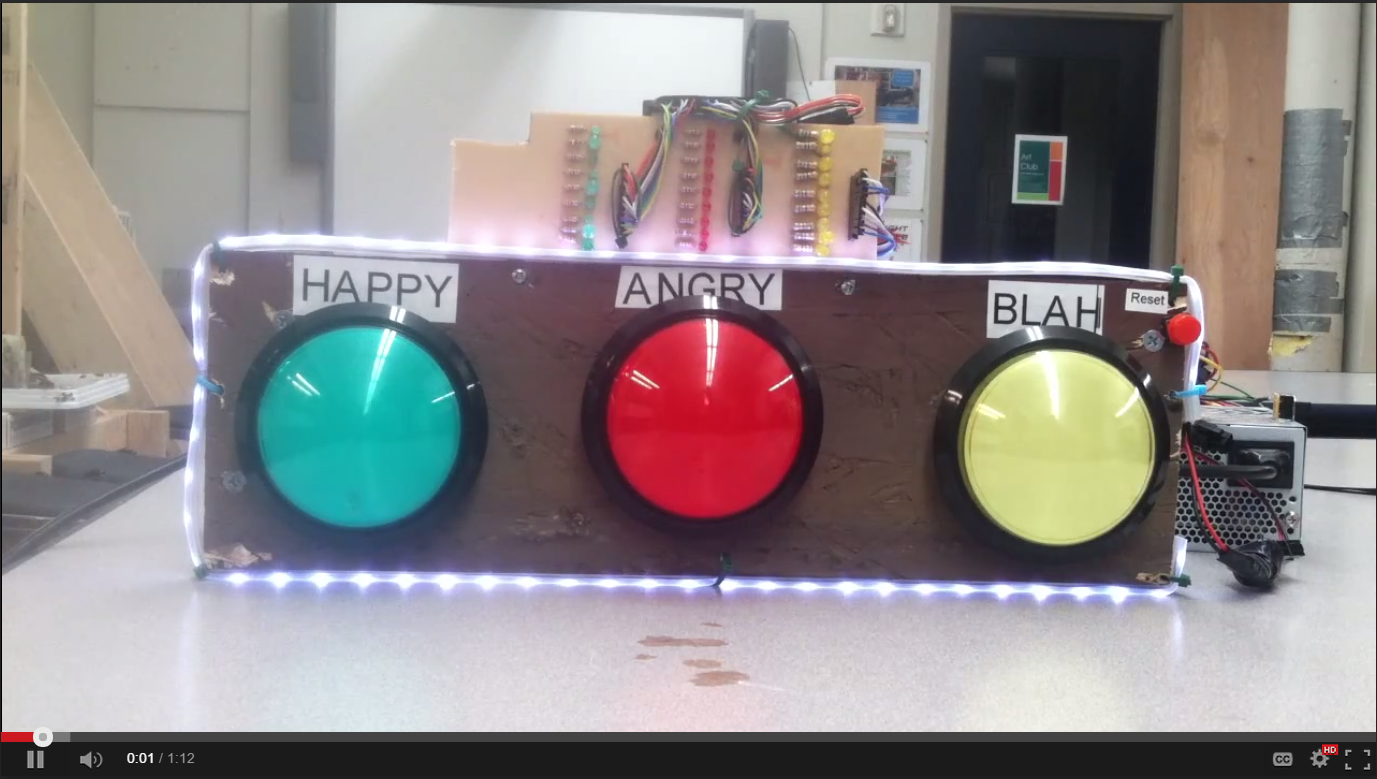
The Mood Machine was based on the fun SparkFun Big Dome Pushbuttons (COM-11275, COM-11273, COM-09181, COM-11274). These have a LED lamp with integrated resistor (designed for 12V input), the a momentary pushbutton. These were wired into a PCB board with pullup resistors (this was a concept we had covered in class using the tutorials at Lady Ada, http://www.ladyada.net/learn/arduino/).
The schematic below shows how the pullup resistors (10k) are used while a 1k resistor is put in series with the pin going to the Arduino Mega. Jack put together the schematic. All the milling files can be downloaded at this link: https://sites.google.com/site/rampantrobots/moodmachine/MoodMachineMillingFiles.zip?attredirects=0&d=1 .


We also made a PCB board to connect a bunch of LEDs and resistors. Female headers are connected to the anode (+ side) of the LED, while the cathode connects to a resistor. The other end of the resistor is connected to ground. Below are two videos which show the board being milled. These were sped up (8x on the first, 4x on the second) in order to be less boring.


We did a LOT of soldering to put 30 LEDs and current limiting resistors on another PCB board.
The board is shown below (this is one third of it actually):

A second circuit board was hacked together when I realized that the 5V outputs from the Arduino Mega could not satisfactorily drive the LED lamps in the pushbuttons. The outputs of this board go into the inputs for the LEDs of the previous board. I used this webpage as a tutorial: http://itp.nyu.edu/physcomp/labs/motors-and-transistors/using-a-transistor-to-control-high-current-loads-with-an-arduino/ .

A couple of these LEDs seem to be systematically burning out, and I'm not sure if this is because of poor resistor selection or so other reason. This is frustrating. A ribbon cable was used to move pins 21 - 52 up near the LEDs, then jumper wires were used to make the connections between the ribbon cable and female headers soldered onto the LED PCB board.

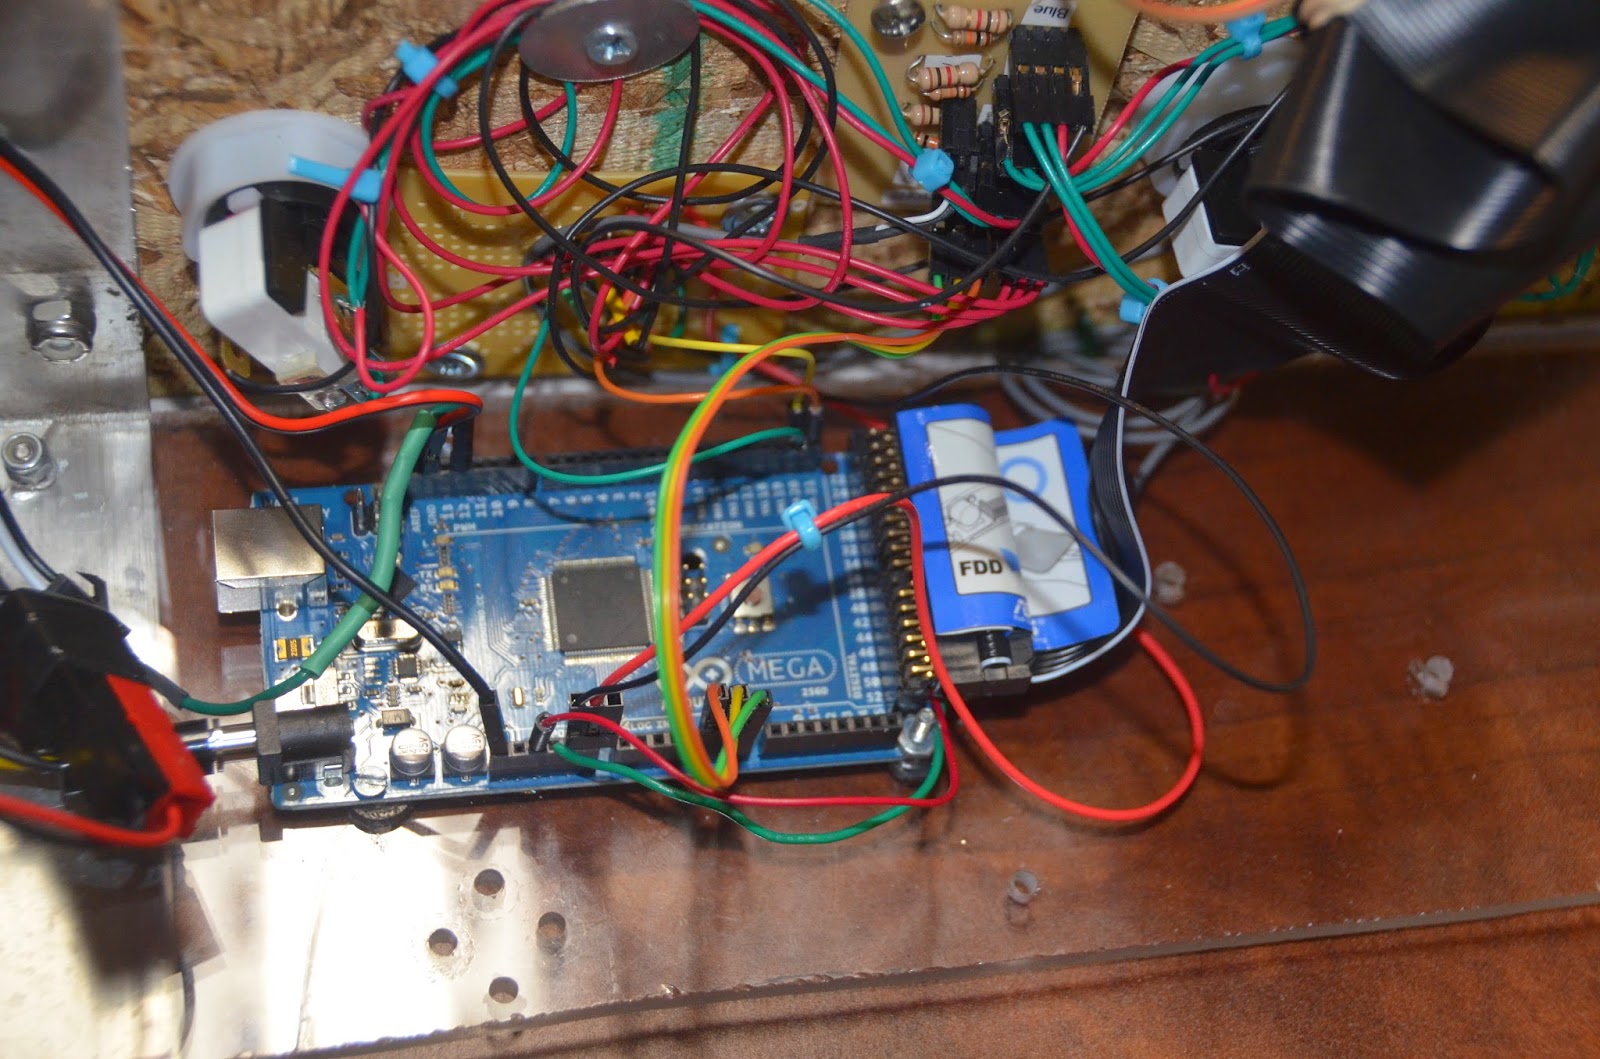

For reference, here is a pinout table for the Arduino.
Green
|
Red
|
Yellow
|
50
|
30
|
26
|
45
|
32
|
28
|
44
|
33
|
24
|
46
|
36
|
BURNED OUT
|
43
|
35
|
23
|
41
|
34
|
27
|
48
|
39
|
25
|
49
|
37
|
29
|
47
|
38
|
31
|
Mega Wiring Diagram:
21… Red Transistor Board Wire
20… Yellow Transistor Board Wire
19… Green Transistor Board Wire
12… RGB Led Strip Control
GND (by #13): Reset
Switch
Reset: Reset Switch
5V: to Grey Cable
(power to pullup resistors board)
GND: to Grey Cable
(ground to pullup resistors board)
A5: Orange Buttons
Wire
A6: Yellow Buttons
Wire
A7: Green Buttons
Wire
Code for this project can be found on GitHub: https://github.com/gcronin/MoodMachine/commit/68a355e7ac28f1ae07ed8b2b43b255907bd23ee0