|
| Figure 1 |
Just a little fun project to attempt to play music with a floppy drive. There are great directions online for how to do this in various locations. I originally worked with a stepper motor and developed an Arduino sketch which played the Star Spangled Banner. The trick to generating a note with a stepper motor is causing the stepper to step with a frequency which matches a musical note. The timing between steps (the period) is the reciprocal of a frequency (Hz). If the frequency is between 20 Hz and 20kHz, the human ear can hear it. In practice, I used frequencies from middle C (C4, 261Hz) to an octave and a half above or G5 (784 Hz) which is the range for the Star Spangled Banner in the key of C.
The Arduino function "note" in Figure 1 calculates the period for a given frequency, and then plays that note. I have borrowed this code from Arduino Forum user "raschemmel" as published on this website:
https://forum.arduino.cc/index.php?topic=343270.0.
 |
| Figure 2 |
I setup a big array containing notes in the first row, and durations in the second row. The notes and durations were defined in musical terms making transposition from sheet music relatively painless although tedious (Figure 2).
The full array defining the song can be found in Github with the rest of the Arduino sketch. Finally, playing the song itself is as simple as a double "for" loop which iterates over the columns of the song array and plays the note for the duration specified in the second "for" loop. I'm proud of the simplicity of the loop function (Figure 3). I also included two scalar variables (tempo and pitch_multiplier) which modify all the duration variables (tempo) or pitch variables (pitch_multiplier) allowing for transposition and tempo control.
 |
| Figure 3 |
While this setup worked, the volume of the stepper was too quiet even when I mounted it on a large piece of metal to use as a resonator. I played around with a piezoelectric pickup and an amplifier circuit (see descriptions later in this post), but the piezo picked up too much vibration noise from the motor and sounded pretty awful.
I stumbled on
Moppy, which seems to be the most popular way of playing music from an actual floppy drive. The principle is presumably similar to my Arduino sketch, except that you feed it a midi file (the equivalent of my array) and it provides a clean Java based user interface. In addition, Moppy supports multitrack midi files so that you can play different "voices" with different floppy drives.
Setup of the floppy was pretty easy once I figured out which pins to connect to the Arduino (Figures 4 and 5).
 |
| Figure 4 |
 |
| Figure 5 |
I modified an existing Star Spangled Banner midi file to leave only the melody line using the program
Anvil Studio. The result is shown in the Youtube video below.
 |
| Figure 6 |
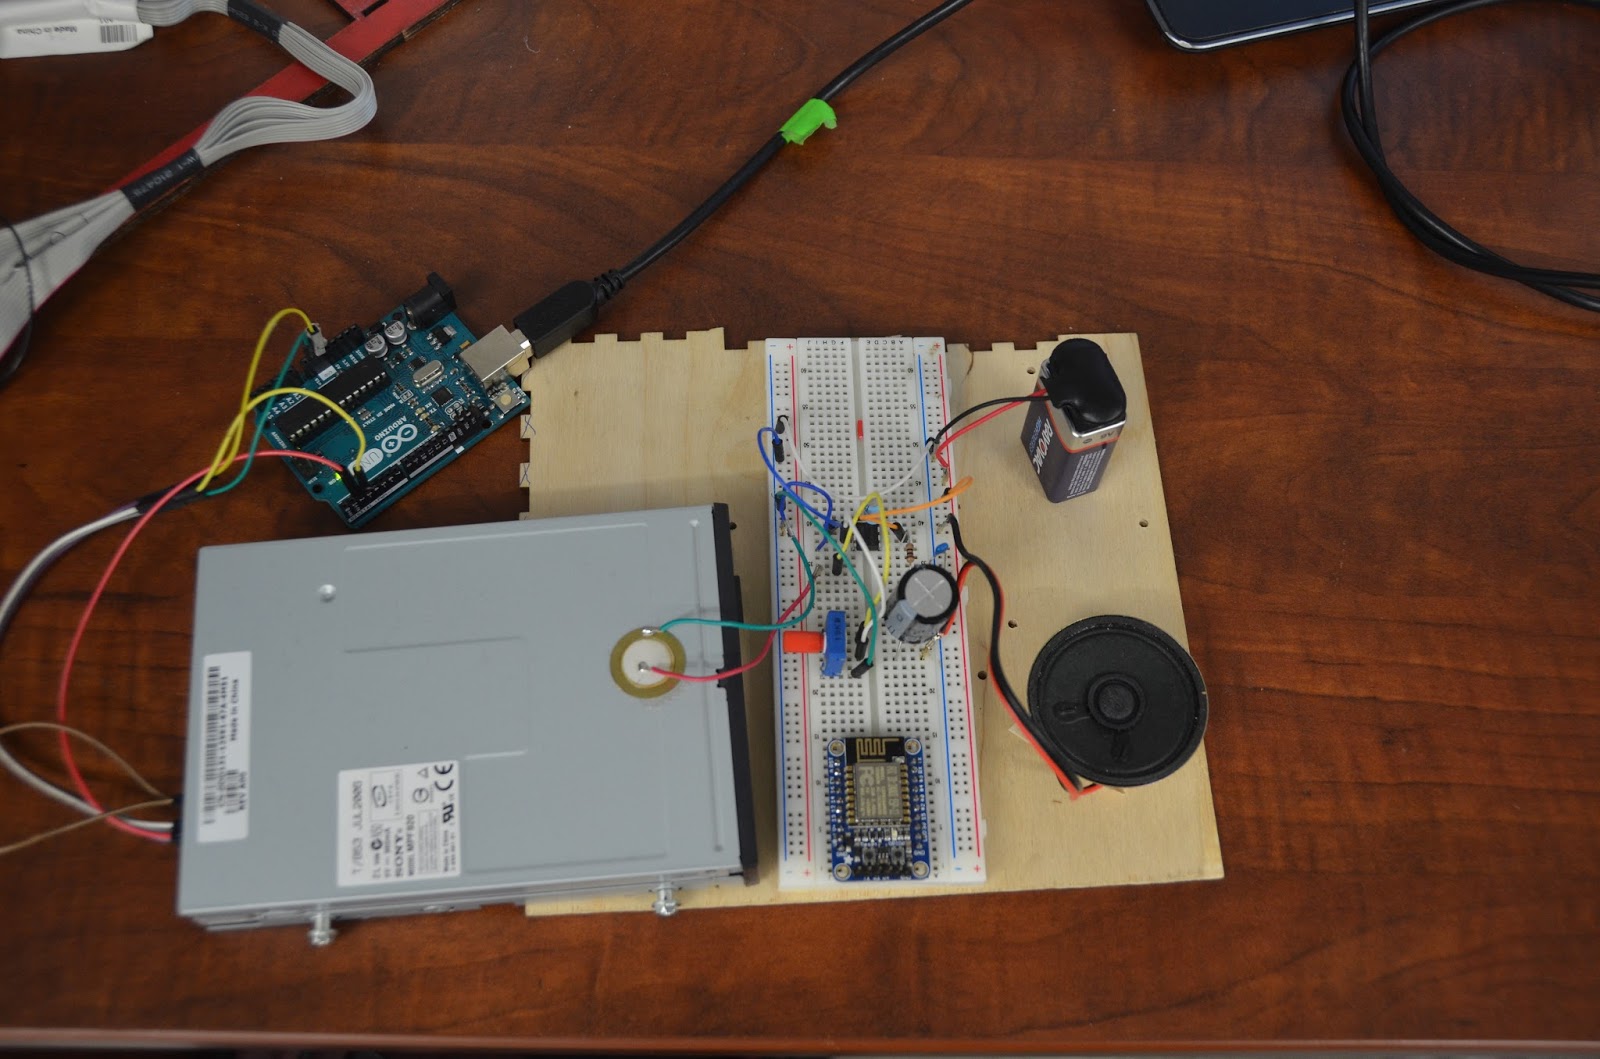
Finally, I used an LM386 chip to breadboard an amplifier circuit driving a small 8 Ohm speaker with the piezoelectric pickup mounted on the case of the floppy drive (Figures 7 and 8).
The circuit was adapted from CircuitBasics. This worked much better than mounting the piezo directly on the stepper, and compounded with the fact that the floppy was much louder than the stepper, I was able to record a decent rendition of the song. I will be playing the video at the opening ceremony of a robotics tournament which my school is hosting.
 |
| Figure 7 |
 |
| Figure 8 |
I made a PCB board (Figure 9) for a semi permanent installation of this circuit. The EagleCAD files are located here:
https://github.com/gcronin/StepperTest/tree/master/LM386%20Amp.
 |
| Figure 9 |
I made a JFET board (Figures 10-11) which was designed by Cafe Walter (
http://www.cafewalter.com/cafewalter/fetpre/) and is open source! Thank you so much!!!
The schematic for this circuit can be found here. The Eagle CAD files for my version of this board
can be found here.
 |
| Figure 10 |
 |
| Figure 11 |